Since the start of the week, I am attempting to explore the concept of contained databases – something that I learnt about during a hands-on lab conducted by Jacob Sebastian. Please read my posts Part 01 and Part 02 in case you missed them.
To get us back into context, let’s revisit the definition of a contained database:
"A contained database has no external dependencies on server-based settings or metadata to define the database. Users defined in a contained database do not have a dependency on logins created on the server, and therefore contain all information necessary to authenticate a user within the database."
Yesterday, we saw how to create our first contained database in the very latest SQL 11 (“Denali”) CTP01, and also learnt a bit about the changes made to the ALTER DATABASE clause in order to support contained databases.
Migrating databases
In order to install a database for an application, server-wide settings potentially must be configured and logins created. When application and database administrators want to move a database from one server instance to another, they need to make sure that each of those settings is identical between instances, and they need the same logins created. I have seen such checklists (excluding the preparation and actual time to apply the changes) running into a number of hours.
SQL 11 (“Denali”) attempts to limit these administrative efforts by introducing contained databases. We will see how by moving the “ContainedDB” we created yesterday across two SQL Servers.
Backing up a contained database
Backing up contained databases is no different than backing up a non-contained database – there is absolutely no difference. So, here’s how you can backup a contained database:
- Login to SQL 11 (“Denali”) via the SSMS
- In the object explorer, navigate out to “ContainedDB”
- Right click, go to Tasks->Backup
Alternatively, you may also want to use the following simple script:
BACKUP DATABASE ContainedDB
TO DISK='E:DatabasesBackupContainedDB.bak'
Restoring a contained database
Once backed up, copy or move the backup to a folder that can be accessed by another instance of SQL 11 (“Denali”). The other instance can be on the same physical machine, or on a remote machine on the network. In my case, I had another instance on the same machine and hence, all I had to do was to use the same physical location as part of the restore.
Again, we have two mechanisms to restore a database, the easy way being via SSMS:
- Login to SQL 11 (“Denali”) via the SSMS
- In the Object Explorer, navigate out to the “Databases” node
- Right-click, and go to Restore Database
Alternatively, you may want to use the following script:
RESTORE DATABASE ContainedDB
FROM DISK='E:DatabasesBackupContainedDB.bak'
Because RESTORE is the opposite of a BACKUP, it’s no wonder that the scripts are quite similar. Yet, when we run the script, we end up in the following error:
Msg 12824, Level 16, State 1, Line 1
The sp_configure value ‘contained database authentication’ must be set to 1 in order to restore a contained database. You may need to use RECONFIGURE to set the value_in_use.
Msg 3013, Level 16, State 1, Line 1
RESTORE DATABASE is terminating abnormally.
So, what went wrong? Any answers?….
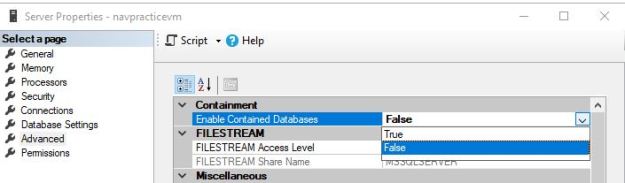
It’s quite simple. Remember from Part 01 that one of the first things we learnt was that SQL 11 (“Denali”) came with the contained database feature turned OFF by default. Hence, in order to create a contained database, one of the first things we did yesterday was to enable the SQL Server to use contained databases. Similarly, to restore a partially contained database, the SQL Server instance needs to have containment enabled.
You can run the following script to enable support of contained databases in SQL 11 (“Denali”). Remember to restart the SQL Server instance after running the script below.
--Enabled Advanced options
sp_configure 'show advanced options',1
RECONFIGURE
GO
--Enabled Database Containment
sp_configure 'contained database authentication',1
RECONFIGURE
GO
--Disable Advanced options
sp_configure 'show advanced options',0
RECONFIGURE
GO
Once the SQL Server instance is restarted, re-run the script to restore the database. The restore will be successful.
Ensuring that the migration worked fine
What better way to test whether or not the migration succeeded is to login to the SQL Server using the credentials of the contained user created in our “ContainedDB”? No such login exists on the SQL Server, and hence, if the login succeeds, the migration worked fine!
- In the Object Explorer, click on the Connect drop-down list and choose “Database engine”
- Change the authentication to “SQL Server Authentication”
- In the login name and password boxes, pass in the login name and the password of the user created (user: “ContainedUser”) yesterday
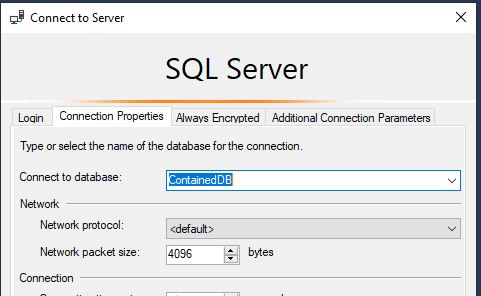
- Do not hit “Enter” key or click on “Connect”. Instead, click on the “Options” button on the “Connect to Server” dialog box
- In the Connect to Database box, type in the name of the contained database, in our case “ContainedDB”
- Now click on “Connect” to connect to the SQL Server
- Notice the level of rights that this user is granted
 |
| NOTE: Please note that no login with this name exists on the SQL Server! Yet, the login succeeded. |
Isn’t working with contained databases easy? I would say that if you have your hands on a copy of SQL 11 (“Denali”) CTP01, give contained databases a try. You will wonder what took so long for this feature to come.
Tomorrow, we will explore how to convert an existing non-contained database to a contained database.
Until tomorrow,
Be courteous. Drive responsibly.