Tag Archives: Tools and Utilities

Articles on various tools & utilities available for Microsoft SQL Server

#0421 – SQL Server – SSIS – Wild card search to find if a file exists in a folder or directory


I recently answered a question on a forum which I believe will be useful to many of the readers in the audience.

SSIS packages are widely used for data import from and export to files. One of the main tasks in this situation would be to check if files with certain kinds of names exist in a particular folder or directory, i.e. basically perform a wild-card search in a directory.

The solution

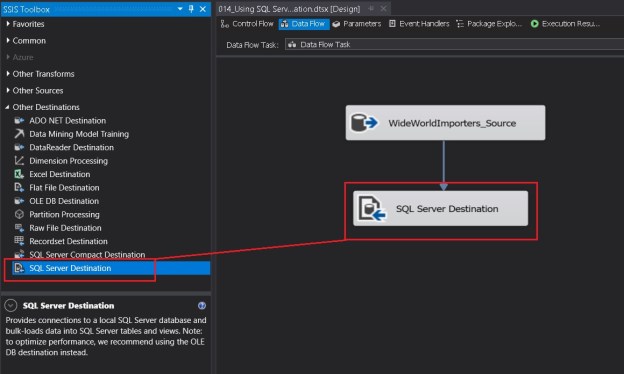
This can be achieved by using the EnumerateFiles() method of the System.IO.Directory class in the SSIS Script task. Here’s the sample package:

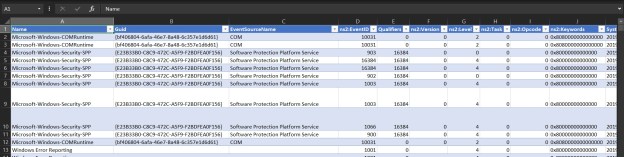
In a folder, I have a set of files, some with similar names (which we will search from the SSIS package).

Files existing in the directory to be searched

The SSIS package has two (2) variables:

Variable NameConfiguration on the Script TaskDescription
SearchPathReadOnly, InputThis is the path to be searched
SearchPatternReadOnly, InputPattern to be searched
FileExistsReadWrite, OutputA boolean indicating downstream processes whether files were found or not
Table 1: Variables on the SSIS package
Screenshot showing the variables and their configuration on the script task

The script is a quite simple implementation as below:

public void Main()
{
    // SQLTwins: SSIS: Blog #0421

    string searchPath = Dts.Variables["User::SearchPath"].Value.ToString();
    string searchPattern = Dts.Variables["User::SearchPattern"].Value.ToString();

    System.Collections.Generic.List<string> searchResults = System.IO.Directory.EnumerateFileSystemEntries(searchPath, searchPattern).ToList();

    if (searchResults.Any())
    {
        Dts.Variables["User::FileExists"].Value = true;
    }

    Dts.TaskResult = (int)ScriptResults.Success;
}

Ensure that you have the following directive in the “namespaces” section of your script:

using System.Linq;

Here’s the script in action:

Screenshot showing the script in debug mode indicating that files were found matching the pattern.

As you can see, the script can help perform a wild-card search in a given folder or directory.

Further Reading:

  • File System errors when trying to move and rename a file [Blog Link]
  • Adding Date & Time to file names after processing [Blog Link]
  • VSTA Errors when working with SSIS packages [Blog Link]
  • System.IO.Directory.EnumerateFiles [MSDN Link]

Until we meet next time,

Be courteous. Drive responsibly.

Advertisement
Import Event Viewer Logs into Excel

#0414 – Analyzing Event Viewer Logs in Excel


When troubleshooting issues, the Event Viewer is one of the most handy of all tools. Assuming that appropriate coding practices were used during application development, the Event Viewer contains a log of most problems – in the system, in the configuration or in the application code.

The only problem is analyzing the Event Viewer logs when you have a thousand events. It becomes extremely difficult to try and answer questions like the following while going through events serially:

  1. Events logged by type for each source
  2. Events by severity
  3. Events by category
  4. And many more such analytical questions…

These analytical requirements are best achieved with tools like Microsoft Excel. And so, I went about analyzing Event Viewer logs in Microsoft Excel in just 2 steps.

Step #1: Export the Event Viewer Logs to XML

  1. Once the Event Viewer is launched, navigate to the Event Log to be evaluated
  2. Right-click on the Event Log and choose “Save All Events As” option
  3. In the Save As dialog, choose to save the Events as an XML file
    • If asked to save display information, you can choose not to store any or choose a language of your choice

And that’s it – it completes the 1st step!

Screenshot showing how to Save the Event Viewer Logs
Save the Event Viewer Logs
Screenshot showing how to save the Event Viewer Logs as an XML file
Choose to save the Event Viewer Logs as an XML file

Step #2: Import the XML file into Excel

  1. Launch Microsoft Excel
  2. In the File -> Open dialog, choose to search files of “XML” type
  3. Select the exported Event Viewer Log file
  4. In the Import Options, you can choose to import as an “XML Table”
    • Excel will prompt to create/determine the XML schema automatically. It’s okay to allow Excel to do so

And that’s it – the Event Viewer Logs are now in Excel and you can use all native Excel capabilities (sort, filter, pivot and so on).

Choose to import the Event Viewer Logs into Excel as an XML table
Import the Event Viewer Logs as an XML table
Image showing the successfully imported Event Viewer data into Microsoft Excel
Event Viewer Logs successfully imported into Excel

I do hope you found this tip helpful. If you have more such thoughts and ideas, drop in a line in the Comments section below.

Until we meet next time,

Be courteous. Drive responsibly.

SSDT 15.5.2 for Visual Studio 2017 Installation Error: 0x80072f76

#0411 – SQL Server – SSDT 15.5.2 for Visual Studio 2017 – Installation failed with error 0x80072f76: Failed to acquire payload


I was recently building up an all-in-one development environment for a project and ran into an unexpected error. I had already installed Microsoft Visual Studio 2017 and attempted to install SQL Server Data Tools (SSDT).

The SSDT 15.5.2 for Visual Studio 2017 failed to install with the following error.

SSDT 15.5.2 for Visual Studio 2017 Installation Error: 0x80072f76

SSDT 15.5.2 for Visual Studio 2017 Installation Error: 0x80072f76

Upon studying the error log file, I found the following sequence of unexpected entries:

Acquiring package: Microsoft.DataTools.AnalysisServices, payload: pay98911873C1CF2F7FF48824555D2B0337, download from: https://go.microsoft.com/fwlink/?linkid=866936
Error 0x80072f08: Failed to send request to URL: https://go.microsoft.com/fwlink/?linkid=866936, trying to process HTTP status code anyway.
Error 0x80072f76: Failed attempt to download URL: 'https://go.microsoft.com/fwlink/?linkid=866936' to: 'C:\Users\sqltwins\AppData\Local\Temp\2\{5C5CD709-A276-454C-88E3-0E939CB80B0E}\pay98911873C1CF2F7FF48824555D2B0337'
Error 0x80072f76: Failed to acquire payload from: 'https://go.microsoft.com/fwlink/?linkid=866936' to working path: 'C:\Users\sqltwins\AppData\Local\Temp\2\{5C5CD709-A276-454C-88E3-0E939CB80B0E}\pay98911873C1CF2F7FF48824555D2B0337'
Failed to acquire payload: pay98911873C1CF2F7FF48824555D2B0337 to working path: C:\Users\sqltwins\AppData\Local\Temp\2\{5C5CD709-A276-454C-88E3-0E939CB80B0E}\pay98911873C1CF2F7FF48824555D2B0337, error: 0x80072f76.
MainViewModel.OnPackageAction: Install CompletedDownload for package SQL Server Analysis Services (id: Microsoft.DataTools.AnalysisServices)
Error 0x80072f76: Failed while caching, aborting execution.

From the error log entries, it is clear that the installer program was unable to access a particular URL in order to download the respective installer components.

So, I took the URL “https://go.microsoft.com/fwlink/?linkid=866936&#8221;, pasted it in the address bar of a browser and immediately ran into a problem:

Your current security settings do not allow this file to be downloaded.

Enhanced Security Configuration (ESC) preventing file downloads

Enhanced Security Configuration (ESC) preventing file downloads

This clearly indicates that the Internet Explorer Enhanced Security Configuration (IE-ESC) was preventing the download and in-turn resulting into the error.

Solution

I immediately added microsoft.com to the “trusted sites” zone and restarted the installer. This time, the installer completed successfully! (One may suggest to disable Enhaned Security Configuration altogether, but that is not recommended due to the obvious security reasons.)

SSDT 15.5.2 for Visual Studio 2017 Installation continues after necessary package URLs are allowed in Enhanced Security Configuration

SSDT 15.5.2 for Visual Studio 2017 Installation

Hope this helps you someday when you are setting up your environments.

References

  • Download SQL Server Data Tools (SSDT): https://docs.microsoft.com/en-us/sql/ssdt/download-sql-server-data-tools-ssdt
  • Internet Explorer Enhanced Security Configuration (ESC): https://support.microsoft.com/en-in/help/815141/internet-explorer-enhanced-security-configuration-changes-the-browsing

Until we meet next time,

Be courteous. Drive responsibly.

#0407 – SQL Server – Clearing out the list of servers in SSMS


Today, I will talk about a very common question that I see in the forums. When you  work with a lot of SQL Server instances, the list of servers seen on the login screen in the SQL Server Management Studio (SSMS) becomes quite long, raising the question:

How to clear out the list of SQL Server instance names in SSMS?

SQL Server 2014 and above

Clearing out servers that no longer exist or to which you no longer need to connect to is quite simple in SQL Server 2014 and above. All you need to do is:

  1. Open SSMS
  2. In the login window,  expand the list of available SQL Server instances
  3. Use the keyboard’s down arrow or use the mouse to scroll down to the instance that needs to be deleted
  4. Once the required instance is selected in the list, just press “Delete” on the keyboard

SSMS_LoginWindow

Just select the appropriate SQL Server instance and press “Delete” to remove it from the SSMS login history

If you are still using an older version of SSMS due to various reasons, there is a manual workaround to this as shown below.

SSMS for SQL Server 2012 and below

  1. Close all open instances of SSMS on your workstation
  2. Depending upon your version of the SSMS client tools, navigate to and delete the files as shown in the table below:
  3. Launch SSMS
  4. It might take a little while to launch, as it recreates the “SqlStudio.bin”/”mru.dat
    • Once launched, you will see that the entire SSMS history is gone
SSMS Client Tools Version Path File to Delete
SQL 2012 %USERPROFILE%AppDataRoamingMicrosoftSQL Server Management Studio11.0 SqlStudio.bin
SQL 2008 %USERPROFILE%AppDataRoamingMicrosoftMicrosoft SQL Server100ToolsShell SqlStudio.bin
SQL 2005 %USERPROFILE%AppDataRoamingMicrosoftMicrosoft SQL Server90ToolsShell mru.dat

Until we meet next time,

Be courteous. Drive responsibly.

#0400 – SQL Server – SSIS – Using the SQL Server Destination


SSIS packages are quite easy to get started with – it’s mostly drag and drop of various containers, tasks and setting of connections. Ensuring that the components work optimally requires using the right mix of tasks based on the scenario at hand.

Often SSIS packages connect to remote data sources & destinations. However, there are cases where the destination is a Microsoft SQL Server and it is required to run the package on the same server where the instance is hosted and we do not need granular grouping. Such situations may include data import into a staging area during migrations or as part of an ETL.

In such situations, the SQL Server destination may prove to be a better option as compared to the OLE DB destination.

Generally,  we would have a data pipeline with an OLE DB destination on the receiving end. The setup for using SQL Server destination is extremely simple – the only change is replacing OLE DB destination with the SQL Server destination. The SQL Server destination performs Bulk Inserts into the destination SQL Server while leveraging shared memory connections to SQL Server over the existing OLE DB connection manager.

The  screenshots below indicate the simplicity of using the SQL Server destination.

01_sqldestinationtask

Adding the SQL Server destination to a data flow

02_sqldestination_connectionmanager

Selecting a connection manager

03_sqldestination_advancedpane

The “Advanced” tab of the SQL Server destination

The Advanced tab (see above) has a host of options to improve the performance and control the behaviour of the bulk inserts made by the SQL Server destination.

  • Keep Identity – controls whether to insert values into an identity column
  • Keep Nulls – controls whether NULLs should be inserted instead of using the default values defined on the column
  • Table Lock – allows to take a higher-level table lock during the bulk insert
  • Check Constraints – controls whether constraints should be checked during the insert or not
  • Fire Triggers – controls whether or not to fire DML triggers defined on the table
  • First Row – specifies the first row to insert. By default all rows are inserted
  • Last Row – specifies the last row to insert. By default all rows are inserted
  • Maximum number of errors – controls the number of errors before the bulk insert operation stops
  • Timeout – controls the bulk insert operation timeout
  • Order Columns – Allows a user to specify the sort order on one or more columns

Summary

The SQL Server Destination is recommended instead of the OLE DB destination if the SSIS package is to be executed on the same machine/server where the target Microsoft SQL Server instance is located. Below are the finer points about the SQL Server destination:

  1. The SSIS package must be executed on the same server where the Microsoft SQL Server instance is located
  2. The Shared Memory protocol for data exchange is enabled for the instance from the SQL Server Configuration Manager
    • Warning: This may need local security policy updates if User Access Control (UAC) is configured
  3. SQL Server destination
    • Only works with OLE DB connection managers (ODBC is not supported)
    • Supports only one input
    • Does not support an error output
    • Performs bulk insert of data
    • Allows leveraging of fast load options of the OLE DB connection

Further Reading

Until we meet next time,

Be courteous.  Drive responsibly.