Today, I will talk about a very common question that I see in the forums. When you work with a lot of SQL Server instances, the list of servers seen on the login screen in the SQL Server Management Studio (SSMS) becomes quite long, raising the question:
How to clear out the list of SQL Server instance names in SSMS?
SQL Server 2014 and above
Clearing out servers that no longer exist or to which you no longer need to connect to is quite simple in SQL Server 2014 and above. All you need to do is:
- Open SSMS
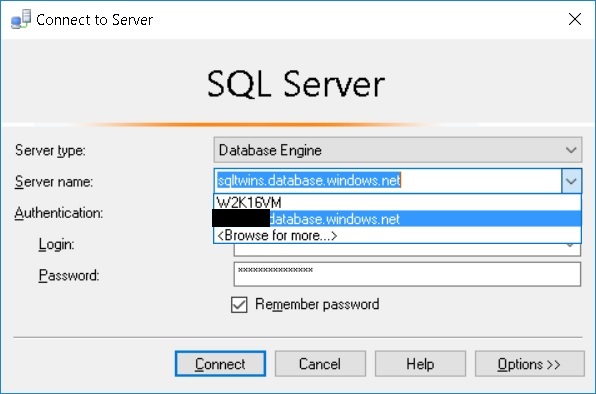
- In the login window, expand the list of available SQL Server instances
- Use the keyboard’s down arrow or use the mouse to scroll down to the instance that needs to be deleted
- Once the required instance is selected in the list, just press “Delete” on the keyboard

Just select the appropriate SQL Server instance and press “Delete” to remove it from the SSMS login history
If you are still using an older version of SSMS due to various reasons, there is a manual workaround to this as shown below.
SSMS for SQL Server 2012 and below
- Close all open instances of SSMS on your workstation
- Depending upon your version of the SSMS client tools, navigate to and delete the files as shown in the table below:
- Launch SSMS
- It might take a little while to launch, as it recreates the “SqlStudio.bin”/”mru.dat”
- Once launched, you will see that the entire SSMS history is gone
| SSMS Client Tools Version | Path | File to Delete |
| SQL 2012 | %USERPROFILE%AppDataRoamingMicrosoftSQL Server Management Studio11.0 | SqlStudio.bin |
| SQL 2008 | %USERPROFILE%AppDataRoamingMicrosoftMicrosoft SQL Server100ToolsShell | SqlStudio.bin |
| SQL 2005 | %USERPROFILE%AppDataRoamingMicrosoftMicrosoft SQL Server90ToolsShell | mru.dat |
Until we meet next time,
Be courteous. Drive responsibly.