Developing SSIS packages is quite easy – it’s mostly drag and drop and some minor configuration. However, when it comes to tuning the package, one needs to understand the finer points of each task on the control flow. On each task, there are some options that help improving the performance of the data flow, whereas some others help regulate the quality of data being migrated.
The OLE DB Destination
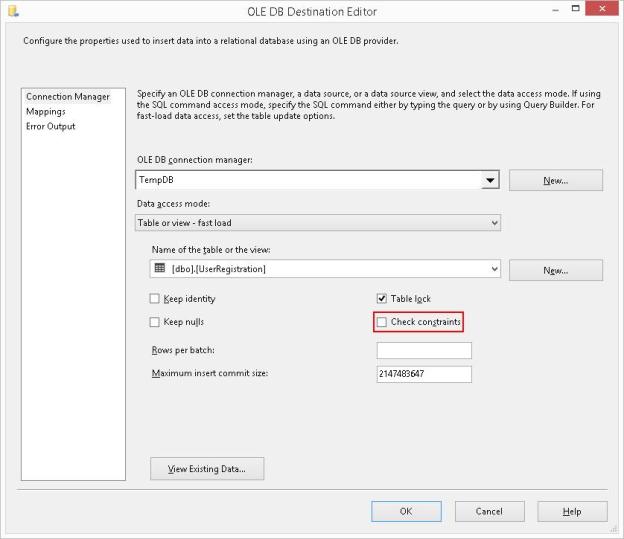
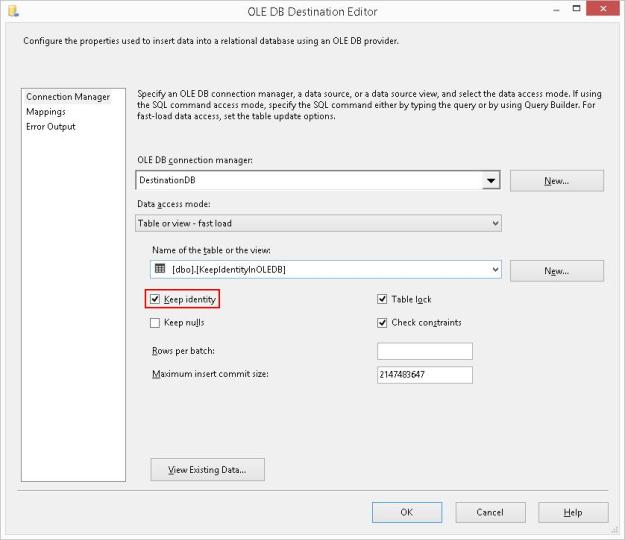
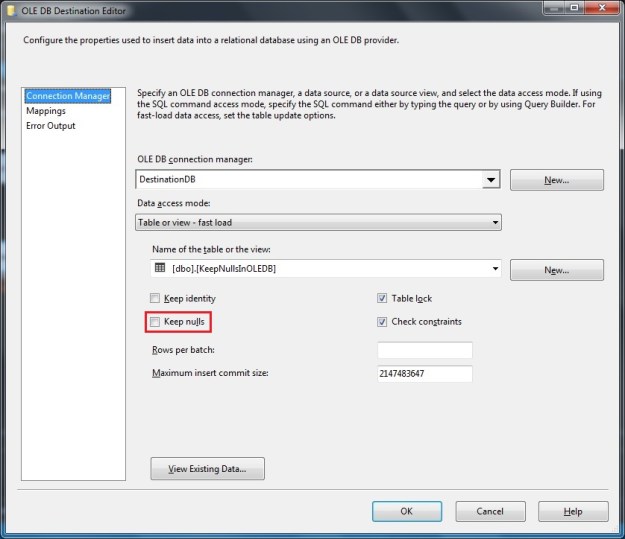
I have been writing about the OLE DB destination in the last couple of posts. In order to load data as quickly into the destination as possible, the OLE DB destination allows us to use a “Fast Load” mode. The “Fast Load” option allows the data team to configure various options that affect the speed of the data load:
- Keep Identity
- Keep NULLs
- Table Lock
- Check Constraints
- Rows per Batch
- Maximum Insert Commit Size
When we use the fast load options of the OLE DB destination, we are essentially using the BULK INSERT T-SQL command. This is the reason we get almost all the options of BULK INSERT in the OLE DB transformation. Today, I will take a look at the last two options which are the secret behind significantly improving the data load performance on a system with a slow I/O subsystem. These are “Rows per Batch” and “Maximum Insert Commit Size”.
My test instance is on my prime development environment and hence even the reasonably large load completes in a couple of minutes. However, on a slow I/O sub-system, the impact of these options will be much higher.
Creating the package with logging for comparing execution time
I have created a simple package that creates a table and inserts data into it. The table is identical to the [Sales].[SalesOrderDetail] table in the [AdventureWorks2014] sample database. The table creation script used in the Execute SQL task on the package is provided below:
USE [tempdb];
GO

IF OBJECT_ID('[dbo].[SalesOrderDetail]','U') IS NOT NULL
BEGIN
    DROP TABLE [dbo].[SalesOrderDetail];
END
GO

CREATE TABLE [dbo].[SalesOrderDetail]
   (
    [SalesOrderID]           [INT]              NOT NULL,
    [SalesOrderDetailID]     [INT]              NOT NULL,
    [CarrierTrackingNumber]  [NVARCHAR](25)         NULL,
    [OrderQty]               [SMALLINT]         NOT NULL,
    [ProductID]              [INT]              NOT NULL,
    [SpecialOfferID]         [INT]              NOT NULL,
    [UnitPrice]              [MONEY]            NOT NULL,
    [UnitPriceDiscount]      [MONEY]            NOT NULL
                             CONSTRAINT [DF_sodUnitPriceDiscount]  DEFAULT ((0.0)),
    [LineTotal]              DECIMAL(38, 6),
    [rowguid]                [UNIQUEIDENTIFIER] NOT NULL,
    [ModifiedDate]           [DATETIME]         NOT NULL
                             CONSTRAINT [DF_sodModifiedDate]  DEFAULT (GETDATE())
   ) ON [PRIMARY]
GO
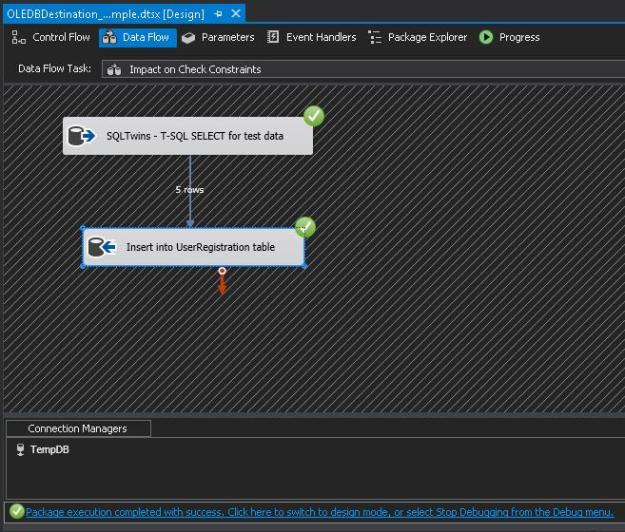
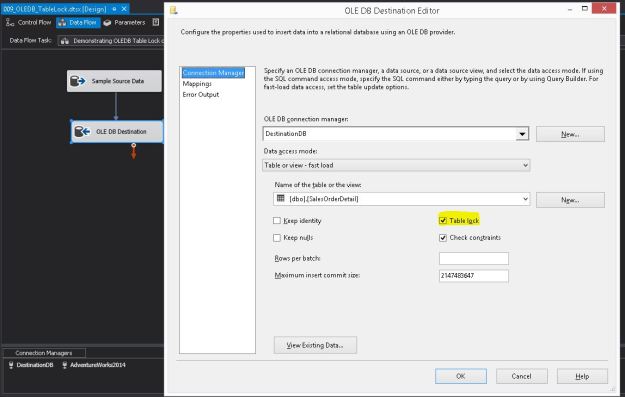
Once the table is created, the package “flows” to the Data Flow Task. Inside the data flow, essentially I simply select about 35,181,930 records by using a CROSS JOIN between the [AdventureWorks2014].[Sales].[SalesOrderDetail] and [AdventureWorks2014].[HumanResources].[Employee] tables using an OLE DB source and pump it to the newly created target table via an OLE DB destination with the “Table Lock” option checked (default).
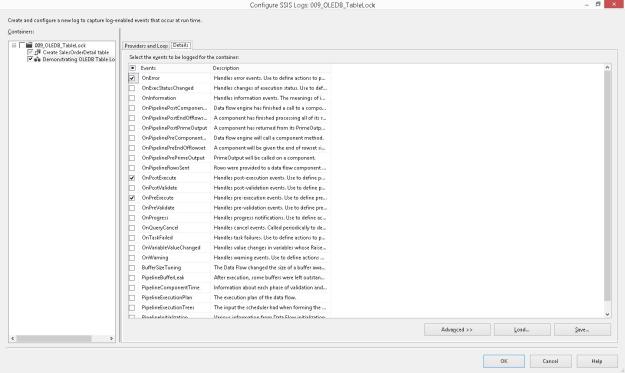
I then configure logging on the package to log the package activity for the Data Flow Task for the OnError, OnPreExecute and OnPostExecute events (Configuring package logging is out of scope for this blog post).
The script used in the OLEDB source is presented here:
SELECT sod.SalesOrderID,
       sod.SalesOrderDetailID,
       sod.CarrierTrackingNumber,
       sod.OrderQty,
       sod.ProductID,
       sod.SpecialOfferID,
       sod.UnitPrice,
       sod.UnitPriceDiscount,
       sod.LineTotal,
       sod.rowguid,
       sod.ModifiedDate
FROM Sales.SalesOrderDetail AS sod
CROSS JOIN HumanResources.Employee AS hre;
GO
Screenshots showing the package configuration described above are shown below.

OLEDB Destination – Package Overview to test Rows/Batch and Max. Insert Commit Size
Please note that between each run, the data buffers were cleaned and procedure cache was cleared out to get a “cold” state performance of the database engine.
CHECKPOINT;
DBCC DROPCLEANBUFFERS;
DBCC FREEPROCCACHE;
GO
Once the package is executed, I will compare the difference between the OnPreExecute and OnPostExecute times for various configurations of the “Row per batch” and “Max. insert commit size” option to get an idea of the performance difference between them.
NOTE: The packages were executed after it was confirmed that the databases involved (in this case tempdb) had grown sufficiently to accommodate the inserted data.
Comparing package execution performance
Because I had turned on logging on the SSIS package, I ran the following query against the [dbo].[sysssislog] table which gives me the time difference (in seconds) between the “OnPreExecute” and “OnPostExecute” events for both the packages. The query and the results are available below:
USE [tempdb];
GO
SELECT [PivotedData].,
       [PivotedData].[OnPreExecute],
       [PivotedData].[OnPostExecute],
       DATEDIFF(SECOND,[PivotedData].[OnPreExecute],[PivotedData].[OnPostExecute]) AS [ExecutionTime]
FROM (SELECT [sl].,
             [sl].[event],
             [sl].[starttime]
      FROM [dbo].[sysssislog] AS [sl] WITH (NOLOCK)
      WHERE ([sl].[event] = 'OnPreExecute'
             OR
             [sl].[event] = 'OnPostExecute'
            )
        AND [sl]. LIKE 'OLEDB%'
     ) AS SourceData
PIVOT (MAX([SourceData].[starttime])
       FOR [SourceData].[event] IN ([OnPreExecute], [OnPostExecute])
      ) AS PivotedData;
GO

OLEDB Destination – Performance impact of adjusting Rows/Batch and Max. Insert Commit Size
As can be seen from the screenshots off the results, the tasks with controlled batch sizes and rows/batch had better performance even on my development environment. I have seen a considerable improvement on systems with poor I/O performance.
Conclusion
The OLE DB destination is, therefore, a very powerful way of tuning the data inserts into a destination SQL Server database.
There is no magic bullet to ensuring SSIS performance, but a thorough evaluation of and appropriate adjustments to the OLEDB destination options based on business rules, overall system configuration and the nature of the workload is sure to get the optimal performance from your packages.
Further Reading
Until we meet next time,
Be courteous. Drive responsibly.